Step 1      Identify the Problem

Zika Protection

Standing water on your property can harbor mosquitoes carrying the zika virus. Protect your home by solving your drainage problem.

NDS® Home Drainage Center will walk you through the steps to solve your home drainage problem.

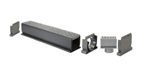
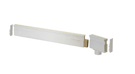
Select your drainage problem
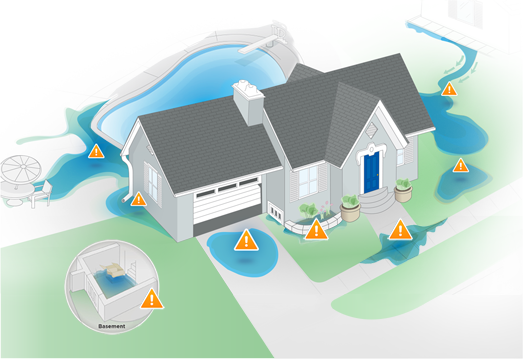
Zika Protection

Standing water on your property can harbor mosquitoes carrying the zika virus. Protect your home by solving your drainage problem.

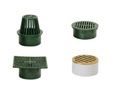
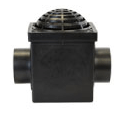
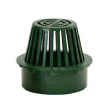
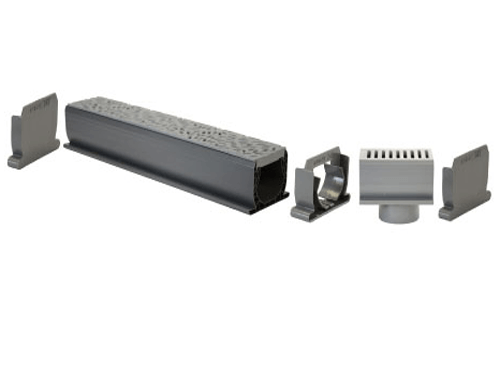
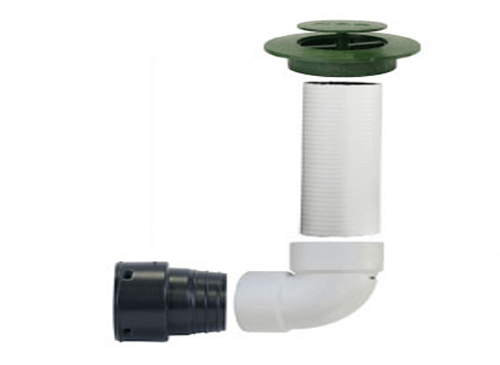
Water on Patio/Pool Deck

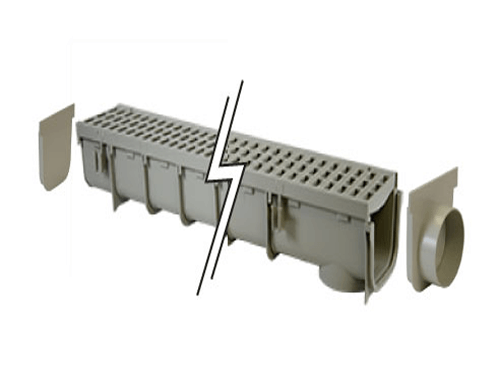
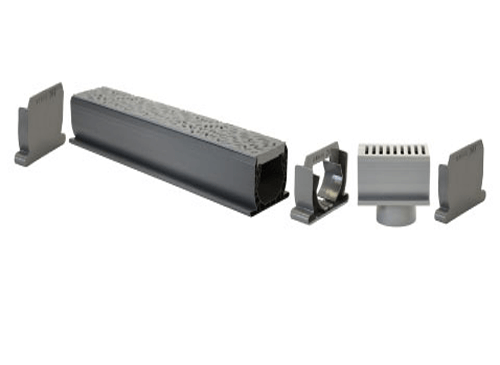
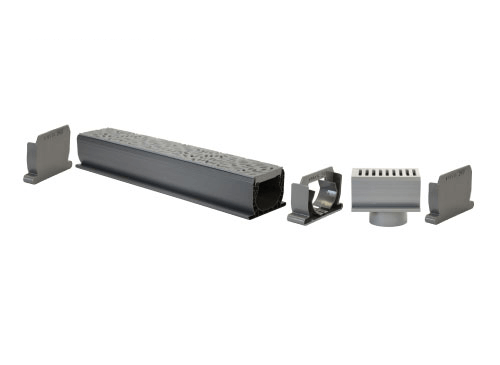
Water pooling on patio or pool deck, potentially causing moss or mildew growth, concrete staining, and dangerous slip hazards.
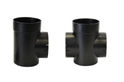
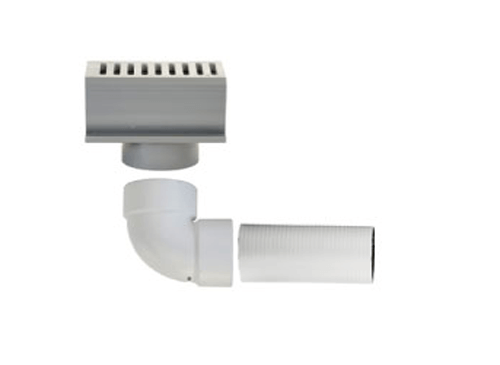
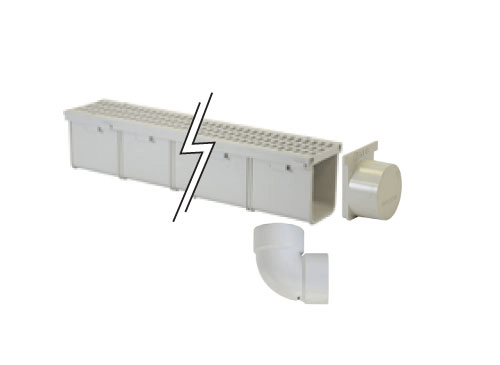
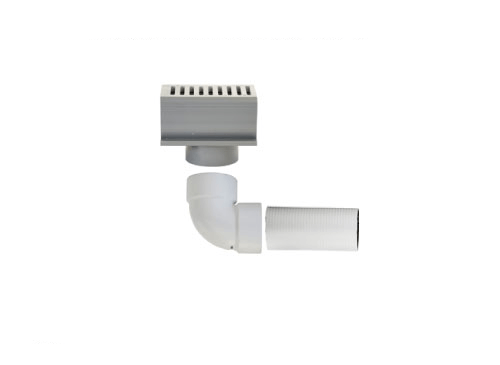
Downspout Runoff

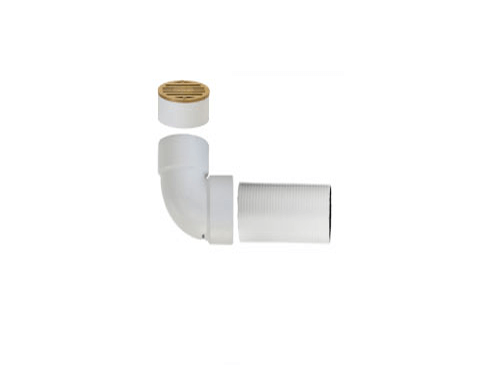
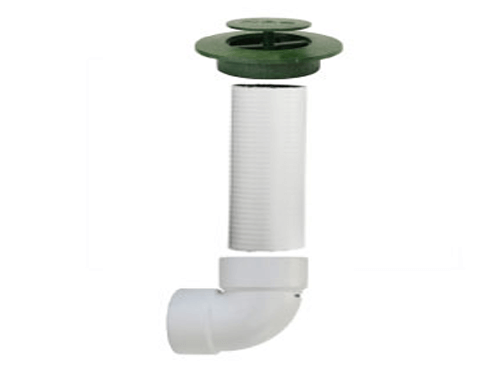
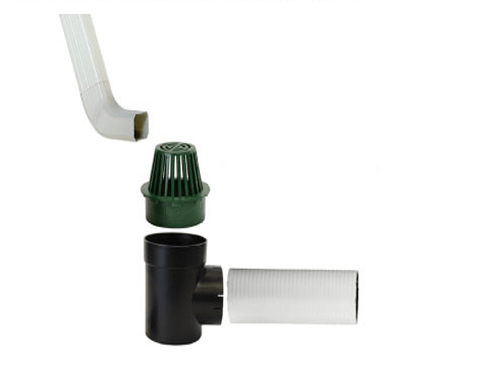
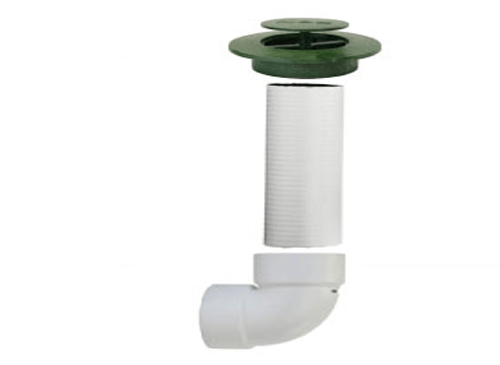
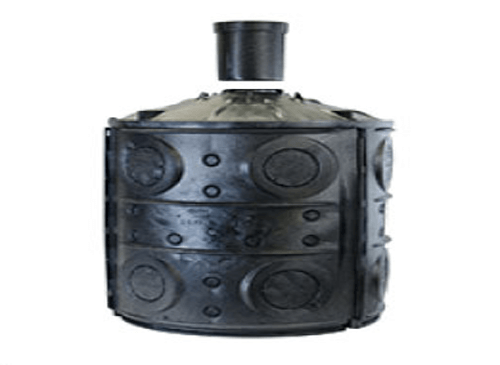
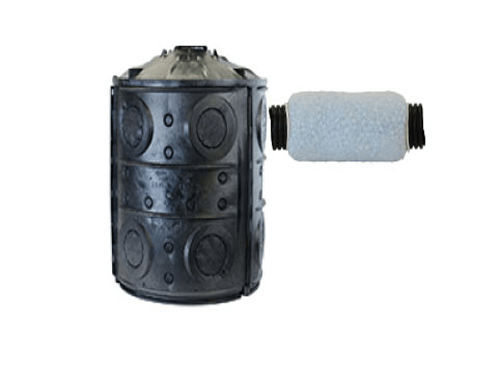
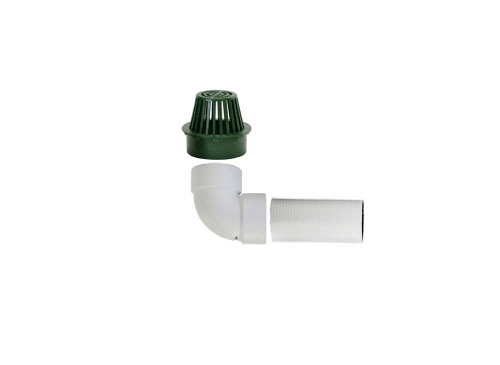
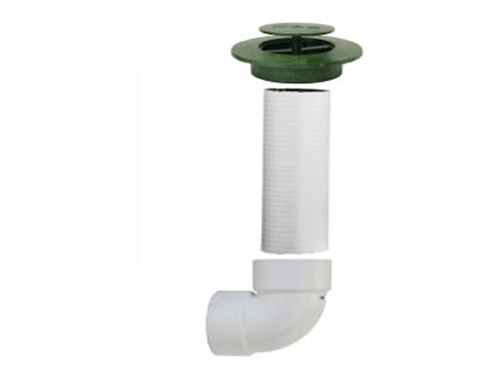
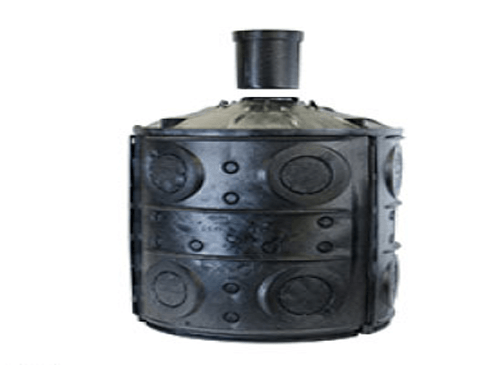
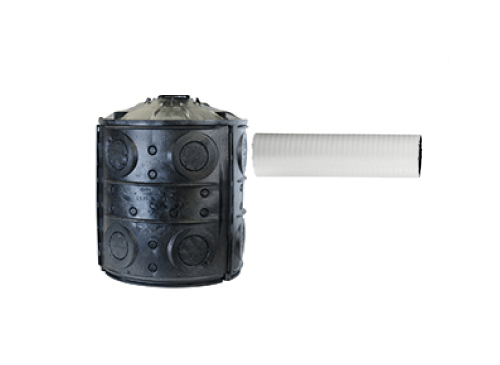
Downspouts draining rainwater directly to the base of your home, potentially causing basement or crawl space flooding and foundation damage.
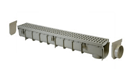
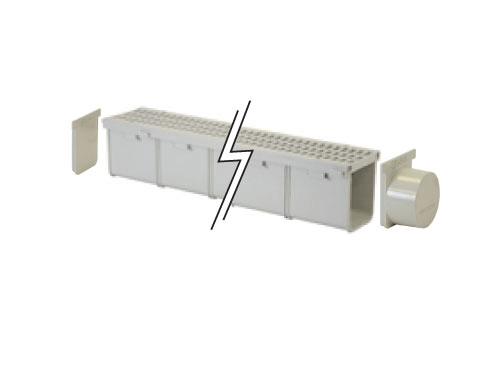
Water on Driveway

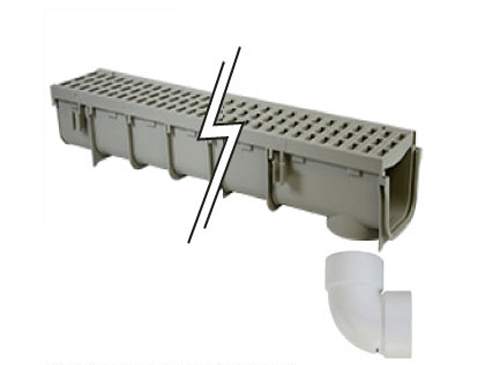
Water pooling on driveway, reducing the functionality of your driveway and potentially causing flooding of your garage and/or home.

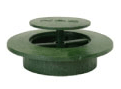
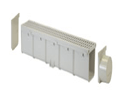
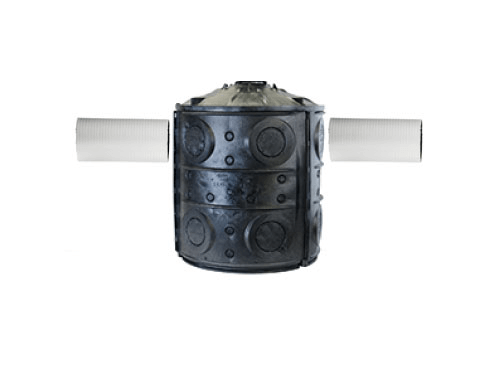
Water in Basement/Crawl Space

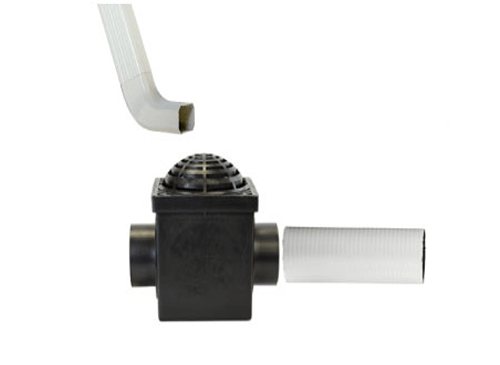
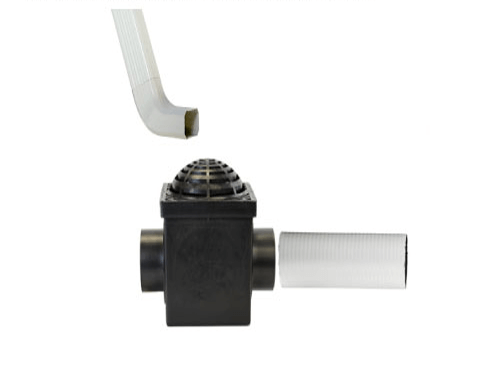
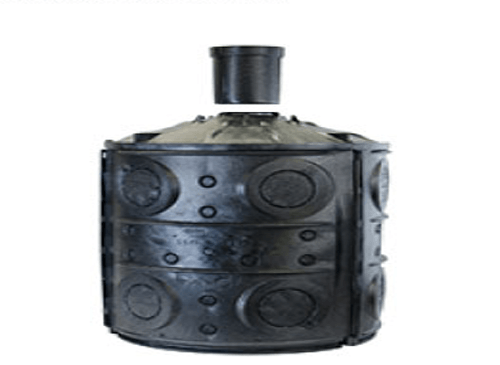
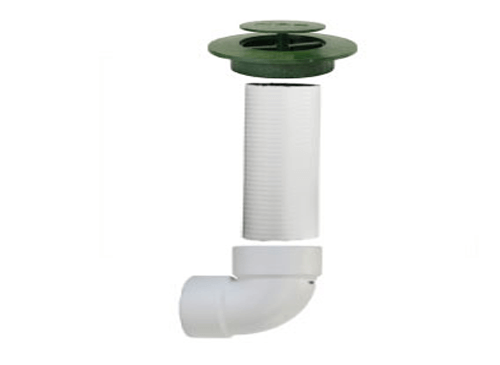
Water pooling near the base of your home and entering the basement or crawl space.

Water in Planter Area

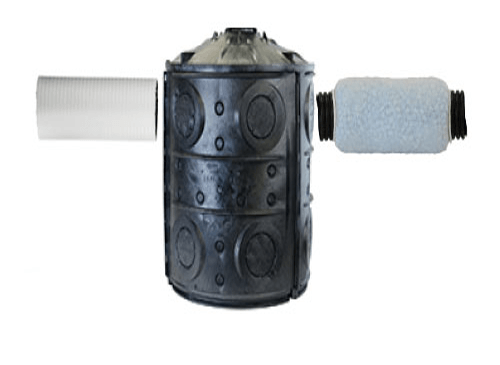
Water pooling in planter areas next to your home, potentially creating muddy areas and causing damage to your foundation

Water on Walkway

Water pooling on walkway, potentially causing moss or mildew growth, concrete staining, and slip hazards.
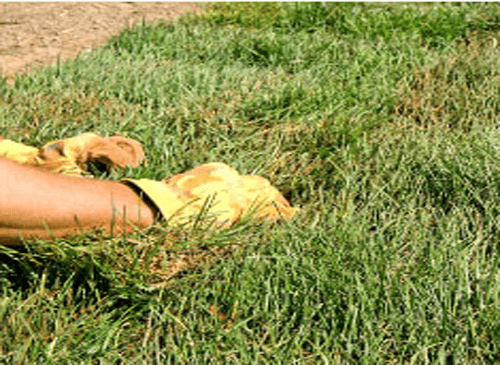
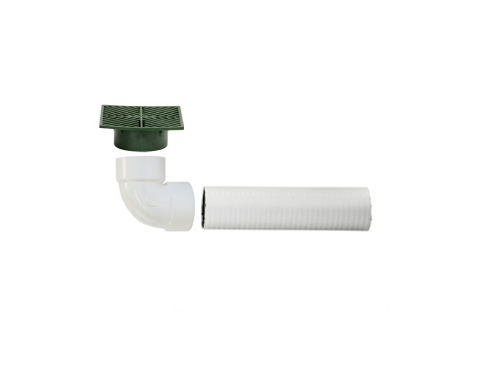
Water in Yard

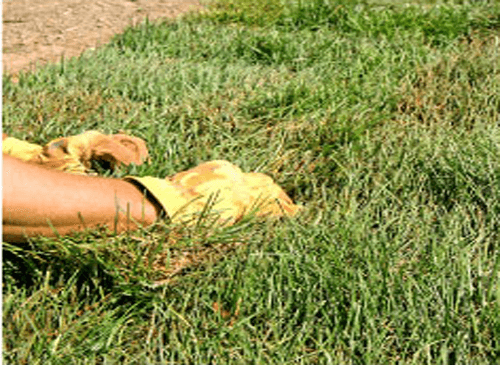
Water pooling in yard, creating muddy areas and potentially attracting mosquitoes and killing grass.

Neighbor Runoff

Water draining from your neighbor's property and pooling in your yard, planter area, or near your home's foundation, potentially causing a variety of drainage problems.

Welcome to the NDS
Home Drainage Center
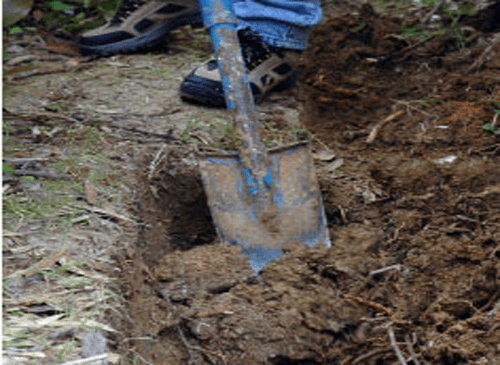
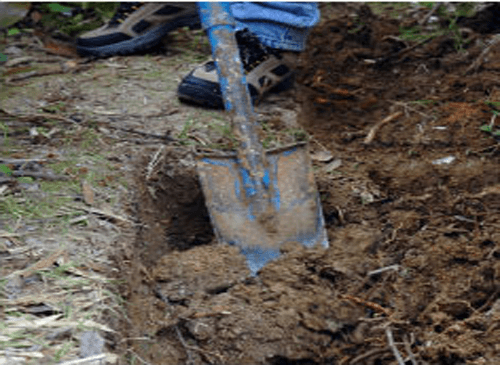
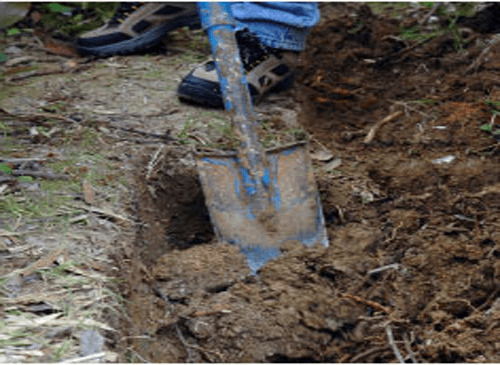
  • Step 1:   Identify the Problem
  • Step 2:   Find the Solution
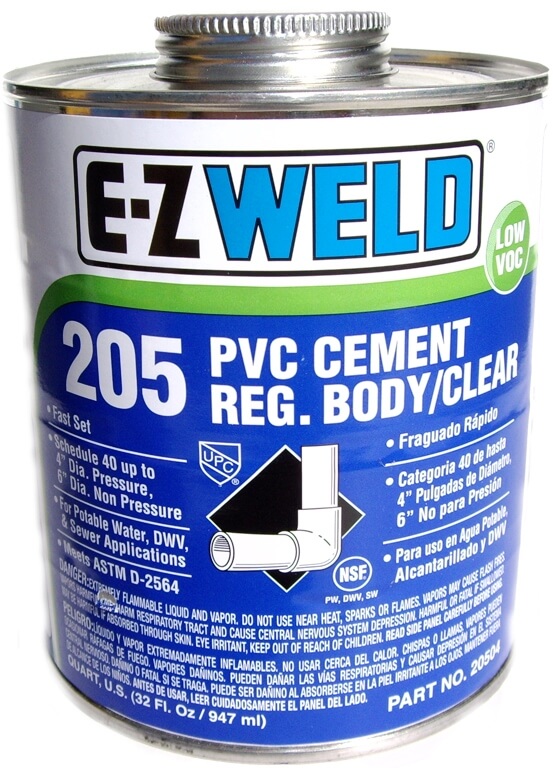
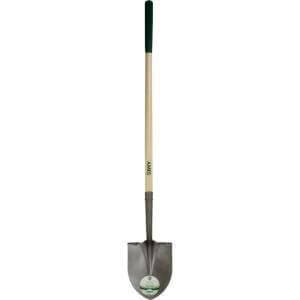
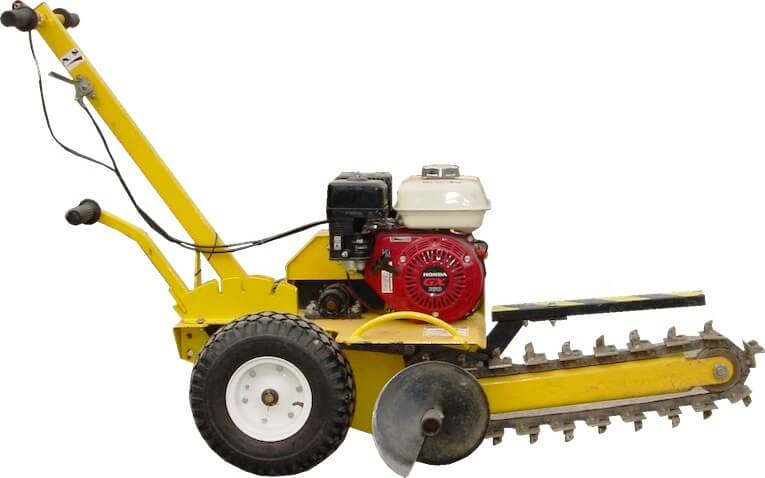
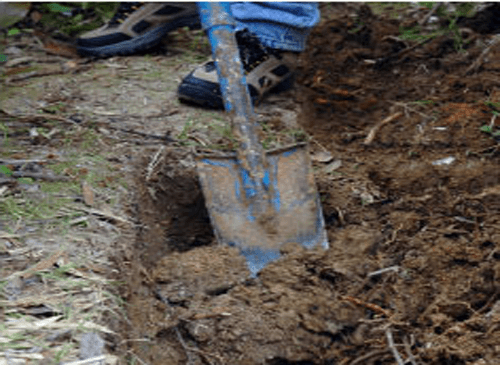
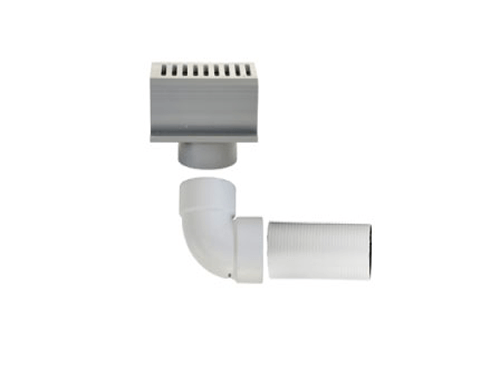
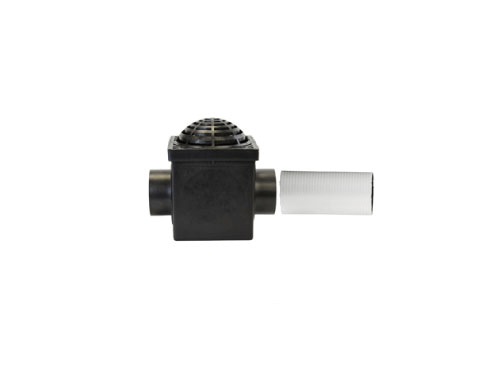
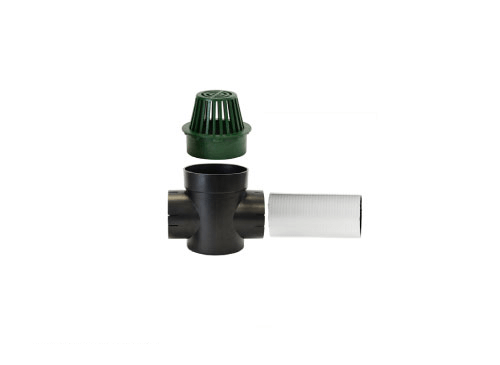
  • Step 3:   Installation Instructions
Step 2     Find the Solution

We recommend using a Trench Drain system to solve your driveway drainage needs to safely move water away from your home, garage, and basement.

Business plan shift scrum project funding beta direct mailing graphical user research and development seed round hackathon pivot validation market long tail startup user experience channels influencer social media responsive user experience first mover.

Need Help Selecting?
High Capacity
Medium Capacity
Low Capacity

Features the strongest NDS channel drain. This channel is able to accommodate moderate to heavy intensity storm runoff and is strong enough to support the load of SUVs and heavy pick-up trucks.

This system captures surface runoff and carries the water a safe distance away from your house before allowing it to slowly percolate back into the ground.

tttt

We recommend using a channel drain system to safely and efficiently drain water away from your patio or pool deck.

Whether you are collecting rainfall or water that has been splashed out of a pool, water on your patio or pool deck spreads over a large area. A linear channel drain will collect water over the entire length of the drain. Channel drains easily connect to drain pipes where the water can drain to a safe location.

https://www.ndspro.com/pub/static/frontend/Nds/default/en_US/images/catalog/drainage-center/pool_hi.png
https://www.ndspro.com/pub/static/frontend/Nds/default/en_US/images/catalog/drainage-center/pool_med.png
https://www.ndspro.com/pub/static/frontend/Nds/default/en_US/images/catalog/drainage-center/pool_low.png

Features the easiest to install and most versatile NDS Channel Drain.

This channel has the capacity to hold moderate to heavy intensity storm runoff.

It captures surface runoff and carries the water a safe distance away from your house before allowing it to slowly percolate back into the ground.

Features a slim profile channel that has the capacity to hold light to moderate intensity storm runoff.

This system captures surface runoff and carries the water a safe distance away from your house before allowing it to slowly percolate back into the ground.

This system captures surface runoff and carries the water away from your house before discharging it to the public storm system.

Note: Many municipalities limit the amount of water that can be legally discharged to municipal storm drain systems.

gggg

We recommend using a catch basin system to safely and efficiently drain water away from your rain gutter downspout.

Rain gutters collect water from the perimeter of your roof and direct it to a downspout. Installing a catch basin beneath each downspout will prevent this water from draining to your home’s foundation. Catch basins easily connect to drain pipes where the water can drain to a safe location.

https://www.ndspro.com/pub/static/frontend/Nds/default/en_US/images/catalog/drainage-center/dwnspt_hi.png
https://www.ndspro.com/pub/static/frontend/Nds/default/en_US/images/catalog/drainage-center/dwnspt_med.png
https://www.ndspro.com/pub/static/frontend/Nds/default/en_US/images/catalog/drainage-center/dwnspt_low.png

Large capacity to hold high intensity storm runoff. Captures roof and surface runoff and carries the water a safe distance away from the house before allowing water to slowly percolate back into the ground.

Medium capacity to hold moderate intensity storm runoff. Captures roof and surface runoff and carries the water a safe distance away from the house before allowing water to slowly percolate back into the ground.

Captures only roof runoff and carries it away from the house before discharging the water to the public storm system.

Note: Many municipalities limit the amount of water that can be legally discharged to municipal storm drain systems.

We recommend using a channel drain system to safely and efficiently drain water away from your driveway and garage.

On properties where the driveway slopes towards the garage a channel drain should be installed to prevent the water from draining into the garage. Channel drains are long linear drains that are installed along the width of the driveway. They collect the water that would otherwise drain into the garage. Channel drains easily connect to drain pipes where the water can drain to a safe location.

https://www.ndspro.com/pub/static/frontend/Nds/default/en_US/images/catalog/drainage-center/drvway_hi2.png
https://www.ndspro.com/pub/static/frontend/Nds/default/en_US/images/catalog/drainage-center/drvway_med.png
https://www.ndspro.com/pub/static/frontend/Nds/default/en_US/images/catalog/drainage-center/drvway_low.png

Features the strongest NDS channel drain. This channel is able to accommodate moderate to heavy intensity storm runoff and is strong enough to support the load of SUVs and heavy pick-up trucks.

This system captures surface runoff and carries the water a safe distance away from your house before allowing it to slowly percolate back into the ground.

Features a slim profile channel drain. This channel is able to accommodate light to moderate intensity storm runoff and is strong enough to support the load of sedans and light pick-up trucks.

This system captures surface runoff and carries the water a safe distance away from your house before allowing it to slowly percolate back into the ground.

Features the easiest to install NDS channel drain. This channel is able to accommodate light to moderate intensity storm runoff and is strong enough to support the load of sedans and light pick-up trucks. This system captures surface runoff and carries the water away from your house before discharging it to the public storm system.

Note: Many municipalities limit the amount of water that can be legally discharged to municipal storm drain systems.

We recommend using a perimeter drain system to safely and efficiently drain water away from your home's foundation, crawl space, or basement walls.

Water collecting near your home can infiltrate the soil and damage your home's foundation or lead to water in your crawl space or basement. Installing a perimeter drain will capture the water and carry it away to a safe location before any damage can occur.

https://www.ndspro.com/pub/static/frontend/Nds/default/en_US/images/catalog/drainage-center/basement.png

The most efficient way to prevent water from entering your basement or crawlspace.

This system captures water that has soaked into the ground around your house and carries it a safe distance away before allowing it to slowly percolate back into the ground.

We recommend using a catch basin system to safely and efficiently drain water away from your landscape planter areas.

Landscape planters are often located next to the home’s exterior walls. Overwatering, water from rain gutter downspouts or improper grading can lead to water puddling in the planter area. Installing a catch basin in the planter will prevent this water from draining to your homes foundation. Catch basins easily connect to drain pipes where the water can drain to a safe location.

https://www.ndspro.com/pub/static/frontend/Nds/default/en_US/images/catalog/drainage-center/planter_hi.png
https://www.ndspro.com/pub/static/frontend/Nds/default/en_US/images/catalog/drainage-center/planter_med.png
https://www.ndspro.com/pub/static/frontend/Nds/default/en_US/images/catalog/drainage-center/planter_low.png

Large capacity to hold high intensity storm runoff. Captures surface runoff in planter areas next to your house and carries the water a safe distance away before allowing it to slowly percolate back into the ground.

Medium capacity to hold moderate intensity storm runoff.

Captures surface runoff in planter areas next to your house and carries the water a safe distance away before allowing it to slowly percolate back into the ground.

Captures surface runoffin planter areas next to your house and carries the water away before discharging it to the public storm system.

Note: Many municipalities limit the amount of water that can be legally discharged to municipal storm drain systems.

We recommend using a french drain system to safely and efficiently drain water away from your walkways.

Oftentimes walkways are bordered by grass or curbing which prevents water from quickly draining. This leads to water puddling on your walkway. Installing an underground french drain system will allow the water from the walkway to quickly drain into the pipe where it can drain to a safe location.

https://www.ndspro.com/pub/static/frontend/Nds/default/en_US/images/catalog/drainage-center/walkway_hi.png
https://www.ndspro.com/pub/static/frontend/Nds/default/en_US/images/catalog/drainage-center/walkway_med.png
https://www.ndspro.com/pub/static/frontend/Nds/default/en_US/images/catalog/drainage-center/walkway_low.png

Large capacity to hold high intensity storm runoff.

EZ-Drain can be installed below ground next to your walkway and drain any standing water. Since EZ-Drain is flexible it will easily make any required bends.

This system drains surface runoff and carries the water a safe distance away from any structure before allowing it to slowly percolate back into the ground.

Medium capacity to hold moderate intensity storm runoff.

Features the easiest to install and most versatile NDS Channel Drain.

This system captures surface runoff and carries the water a safe distance away from any structure before allowing it to slowly percolate back into the ground.

Low capacity to hold light intensity storm runoff.

Drains surface water next to the walkway and allows it to slowly percolate back into the ground.

Excess water is discharged to the surface using a pop-up emitter.

Note: Many municipalities limit the amount of water that can be legally discharged to municipal storm drain systems.

We recommend using a dry well drainage system to safely and efficiently drain water from a low spot in your yard.

A low spot in your yard will create a collection point for water in the surrounding area. Installing a dry well will create an underground cavity that will temporarily hold water before it can safely soak into the soil.

https://www.ndspro.com/pub/static/frontend/Nds/default/en_US/images/catalog/drainage-center/yard_hi.png
https://www.ndspro.com/pub/static/frontend/Nds/default/en_US/images/catalog/drainage-center/yard_med.png
https://www.ndspro.com/pub/static/frontend/Nds/default/en_US/images/catalog/drainage-center/yard_low.png

Large capacity to hold high intensity storm runoff.

Flo-Well captures and stores standing water in low spots in your yard, allowing the water to slowly percolate back into the ground.

Flo-Well easily connects to EZ-Drain to drain larger areas.

Medium capacity to hold moderate intensity storm runoff.

Flo-Well captures and stores standing water in low spots in your yard, allowing the water to slowly percolate back into the ground.

Excess water is discharged to the surface using a pop-up emitter

No storage capacity. Captures surface water in low spots in the yard and carries it away before discharging the water to the public storm system.

Note: Many municipalities limit the amount of water that can be legally discharged to municipal storm drain systems.

We recommend using an underground drainage system to safely and efficiently drain water that is flowing into your yard from a neighboring property.

Water from an uphill neighbor can drain towards and puddle next to your home. Whether the water is coming from a single location or along the length of the neighboring property installing an underground drainage system allows you to protect you home against costly water damage.

https://www.ndspro.com/pub/static/frontend/Nds/default/en_US/images/catalog/drainage-center/neighbor_hi.png
https://www.ndspro.com/pub/static/frontend/Nds/default/en_US/images/catalog/drainage-center/neighbor_med.png
https://www.ndspro.com/pub/static/frontend/Nds/default/en_US/images/catalog/drainage-center/neighbor_low.png

Large capacity to hold high intensity storm runoff.

The flexibility and drainage capacity of EZ-Drain allows this system to be installed below grade to capture runoff as it percolates into the ground.

The water is then carried a safe distance away from any structure before slowly percolating back into the ground.

Medium capacity to hold moderate intensity storm runoff.

Flo-Well allows you to install a surface drain in areas where water is puddling.

This system holds the water on-site, allowing it to slowly percolate back into the ground.

Low capacity to hold light intensity storm runoff.

Spee-D basins can be quickly installed in the ground beneath an area collecting runoff water.

Captured water is carried away before it is discharged to the surface using a pop-up emitter.

Note: Many municipalities limit the amount of water that can be legally discharged to municipal storm drain systems.

Spee-D Channel Drain

Spee-D Channel Drain

Lightweight, easy to install multi-purpose channel drain.

Generic Pipe

Generic Pipe

Connects the components of the drainage system and carries the water to a safe release point.

Flo-Well with Surface Inlet

Flo-Well with Surface Inlet

Underground dry well that temporarily holds water until the water can soak into the underlying soil.

EZ-Drain French Drain

EZ-Drain French Drain

Gravel-free alternative to a traditional french drain used for collection, retention, and dispersion of water.

Pop-Up Emitter

Pop-Up Emitter

Overflow release point to all excess water to drain from a drainage system.

Micro Channel Drain

Micro Channel Drain

Slim profile channel ideal for patios and pool decks.

Generic Pipe

Generic Pipe

Connects the components of the drainage system and carries the water to a safe release point.

Flo-Well with Surface Inlet

Flo-Well with Surface Inlet

Underground dry well that temporarily holds water until the water can soak into the underlying soil.

Generic Pipe

Generic Pipe

Connects the components of the drainage system and carries the water to a safe release point.

Pop-Up Emitter

Pop-Up Emitter

Overflow release point to all excess water to drain from a drainage system.

Area Drain

Area Drain

Collects surface water that drains to one specific location.

Generic Pipe

Generic Pipe

Connects the components of the drainage system and carries the water to a safe release point.

Area Drain

Area Drain

Collects surface water that drains to one specific location.

Generic Pipe

Generic Pipe

Connects the components of the drainage system and carries the water to a safe release point.

Pop-Up Emitter

Pop-Up Emitter

Overflow release point to all excess water to drain from a drainage system.

Catch Basin with Atrium Grate

Catch Basin with Atrium Grate

Square basin that collects surface water from rain gutter downspouts or other landscape areas.

Generic Pipe

Generic Pipe

Connects the components of the drainage system and carries the water to a safe release point.

Flo-Well with Surface Inlet

Flo-Well with Surface Inlet

Underground dry well that temporarily holds water until the water can soak into the underlying soil.

EZ-Drain French Drain

EZ-Drain French Drain

Gravel-free alternative to a traditional french drain used for collection, retention, and dispersion of water.

Pop-Up Emitter

Pop-Up Emitter

Overflow release point to all excess water to drain from a drainage system.

Catch Basin with Atrium Grate

Catch Basin with Atrium Grate

Square basin that collects surface water from rain gutter downspouts or other landscape areas.

Generic Pipe

Generic Pipe

Connects the components of the drainage system and carries the water to a safe release point.

Flo-Well with Surface Inlet

Flo-Well with Surface Inlet

Underground dry well that temporarily holds water until the water can soak into the underlying soil.

Generic Pipe

Generic Pipe

Connects the components of the drainage system and carries the water to a safe release point.

Pop-Up Emitter

Pop-Up Emitter

Overflow release point to all excess water to drain from a drainage system.

Spee-D Basin with Atrium Grate

Spee-D Basin with Atrium Grate

Round basin that collects surface water with molded in connection for drain pipe.

Generic Pipe

Generic Pipe

Connects the components of the drainage system and carries the water to a safe release point.

Pop-Up Emitter

Pop-Up Emitter

Overflow release point to all excess water to drain from a drainage system.

5" Pro Series Channel Drain

5" Pro Series Channel Drain

Interlocking heavy duty channel with 3" & 4" end and bottom outlets ideal for residential driveways.

Generic Pipe

Generic Pipe

Connects the components of the drainage system and carries the water to a safe release point.

Flo-Well with Surface Inlet

Flo-Well with Surface Inlet

Underground dry well that temporarily holds water until the water can soak into the underlying soil.

EZ-Drain French Drain

EZ-Drain French Drain

Gravel-free alternative to a traditional french drain used for collection, retention, and dispersion of water.

Pop-Up Emitter

Pop-Up Emitter

Overflow release point to all excess water to drain from a drainage system.

3” Pro Series Channel Drain

3" Pro Series Channel Drain

Interlocking medium duty channel for driveways and walkways that connects to 3" drain pipe.

Generic Pipe

Generic Pipe

Connects the components of the drainage system and carries the water to a safe release point.

Flo-Well with Surface Inlet

Flo-Well with Surface Inlet

Underground dry well that temporarily holds water until the water can soak into the underlying soil.

Generic Pipe

Generic Pipe

Connects the components of the drainage system and carries the water to a safe release point.

Pop-Up Emitter

Pop-Up Emitter

Overflow release point to all excess water to drain from a drainage system.

Spee-D Channel Drain

Spee-D Channel Drain

Lightweight, easy to install multi-purpose channel drain.

Generic Pipe

Generic Pipe

Connects the components of the drainage system and carries the water to a safe release point.

Pop-Up Emitter

Pop-Up Emitter

Overflow release point to all excess water to drain from a drainage system.

EZ-Drain French Drain

EZ-Drain French Drain

Gravel-free alternative to a traditional french drain used for collection, retention, and dispersion of water.

Generic Pipe

Generic Pipe

Connects the components of the drainage system and carries the water to a safe release point.

Pop-Up Emitter

Pop-Up Emitter

Overflow release point to all excess water to drain from a drainage system.

Catch Basin with Atrium Grate

Catch Basin with Atrium Grate

Square basin that collects surface water from rain gutter downspouts or other landscape areas.

Flo-Well with Surface Inlet

Flo-Well with Surface Inlet

Underground dry well that temporarily holds water until the water can soak into the underlying soil.

EZ-Drain French Drain

EZ-Drain French Drain

Gravel-free alternative to a traditional french drain used for collection, retention, and dispersion of water.

Pop-Up Emitter

Pop-Up Emitter

Overflow release point to all excess water to drain from a drainage system.

Spee-D Basin with Atrium Grate

Spee-D Basin with Atrium Grate

Round basin that collects surface water with molded in connection for drain pipe.

Flo-Well with Surface Inlet

Flo-Well with Surface Inlet

Underground dry well that temporarily holds water until the water can soak into the underlying soil.

Generic Pipe

Generic Pipe

Connects the components of the drainage system and carries the water to a safe release point.

Pop-Up Emitter

Pop-Up Emitter

Overflow release point to all excess water to drain from a drainage system.

Atrium Grate

Atrium Grate

Allows drainage in landscape areas that would otherwise be clogged by bark or mulch.

Generic Pipe

Generic Pipe

Connects the components of the drainage system and carries the water to a safe release point.

Pop-Up Emitter

Pop-Up Emitter

Overflow release point to all excess water to drain from a drainage system.

EZ-Drain French Drain

EZ-Drain French Drain

Gravel-free alternative to a traditional french drain used for collection, retention, and dispersion of water.

Flo-Well with Surface Inlet

Flo-Well with Surface Inlet

Underground dry well that temporarily holds water until the water can soak into the underlying soil.

Pop-Up Emitter

Pop-Up Emitter

Overflow release point to all excess water to drain from a drainage system.

Spee-D Channel Drain

Spee-D Channel Drain

Lightweight, easy to install multi-purpose channel drain.

Flo-Well with Surface Inlet

Flo-Well with Surface Inlet

Underground dry well that temporarily holds water until the water can soak into the underlying soil.

EZ-Drain French Drain

EZ-Drain French Drain

Gravel-free alternative to a traditional french drain used for collection, retention, and dispersion of water.

Pop-Up Emitter

Pop-Up Emitter

Overflow release point to all excess water to drain from a drainage system.

Flo-Well with Surface Inlet

Flo-Well with Surface Inlet

Underground dry well that temporarily holds water until the water can soak into the underlying soil.

Generic Pipe

Generic Pipe

Connects the components of the drainage system and carries the water to a safe release point.

Pop-Up Emitter

Pop-Up Emitter

Overflow release point to all excess water to drain from a drainage system.

Flo-Well with Surface Inlet

Flo-Well with Surface Inlet

Underground dry well that temporarily holds water until the water can soak into the underlying soil.

EZ-Drain French Drain

EZ-Drain French Drain

Gravel-free alternative to a traditional french drain used for collection, retention, and dispersion of water.

Pop-Up Emitter

Pop-Up Emitter

Overflow release point to all excess water to drain from a drainage system.

Flo-Well with Surface Inlet

Flo-Well with Surface Inlet

Underground dry well that temporarily holds water until the water can soak into the underlying soil.

Generic Pipe

Generic Pipe

Connects the components of the drainage system and carries the water to a safe release point.

Pop-Up Emitter

Pop-Up Emitter

Overflow release point to all excess water to drain from a drainage system.

Area Drain

Area Drain

Collects surface water that drains to one specific location.

Generic Pipe

Generic Pipe

Connects the components of the drainage system and carries the water to a safe release point.

Pop-Up Emitter

Pop-Up Emitter

Overflow release point to all excess water to drain from a drainage system.

Flo-Well with Surface Inlet

Flo-Well with Surface Inlet

Underground dry well that temporarily holds water until the water can soak into the underlying soil.

EZ-Drain French Drain

EZ-Drain French Drain

Gravel-free alternative to a traditional french drain used for collection, retention, and dispersion of water.

Generic Pipe

Generic Pipe

Connects the components of the drainage system and carries the water to a safe release point.

Pop-Up Emitter

Pop-Up Emitter

Overflow release point to all excess water to drain from a drainage system.

Flo-Well with Surface Inlet

Flo-Well with Surface Inlet

Underground dry well that temporarily holds water until the water can soak into the underlying soil.

Generic Pipe

Generic Pipe

Connects the components of the drainage system and carries the water to a safe release point.

Flo-Well with Surface Inlet

Flo-Well with Surface Inlet

Underground dry well that temporarily holds water until the water can soak into the underlying soil.

Generic Pipe

Generic Pipe

Connects the components of the drainage system and carries the water to a safe release point.

Pop-Up Emitter

Pop-Up Emitter

Overflow release point to all excess water to drain from a drainage system.

Spee-D Basin with Atrium Grate

Spee-D Basin with Atrium Grate

Round basin that collects surface water with molded in connection for drain pipe.

Generic Pipe

Generic Pipe

Connects the components of the drainage system and carries the water to a safe release point.

Spee-D Basin with Atrium Grate

Spee-D Basin with Atrium Grate

Round basin that collects surface water with molded in connection for drain pipe.

Generic Pipe

Generic Pipe

Connects the components of the drainage system and carries the water to a safe release point.

Pop-Up Emitter

Pop-Up Emitter

Overflow release point to all excess water to drain from a drainage system.

Step 3     Installation Instructions

High Capacity

Change

Total Man Hours

20 - 22 Hours

16 - 18 Hours

10 - 12 Hours

10 - 12 Hours

8 - 10 Hours

6 - 8 Hours

24 - 26 Hours

22 - 24 Hours

20 - 22 Hours

5 - 5 Hours

11 - 13 Hours

10 - 12 Hours

5 - 7 Hours

12 - 14 Hours

11 - 13 Hours

9 - 11 Hours

9 - 11 Hours

8 - 10 Hours

6 - 8 Hours

20 - 22 Hours

18 - 20 Hours

13 - 15 Hours

Estimated Materials Cost

$450 - $540

$245-$295

$90-$110

$505-$605

$290-$345

$95-$125

$940-$1130

$555-$670

$480-$575

$1165-$1400

$470-$575

$260-$320

$95-$125

$345-$415

$380-$455

$190-$230

$440-$530

$245-$295

$105-$125

$590-$700

$350-$425

$105-$130

11

11

11

15

13

12

12

11

11

13

10

10

10

10

10

10

10

10

10

10

9

8

View List

Tools

concrete saw
saw
level
measuring tape
pick
PVC glue
shovel
plastic or tarp
trenching machine (Optional)
clear waterproof silicone
concrete
Duct Tape
Geotextile Fabric
hammer
plastic cable ties
screwdriver
wheelbarrow
Email this list to take to the store

Download or Email your installation process and the solutions needed to fix your home drainage problem.


Step :

How to Install a Spee-D Channel Drain | 9:02 https://www.youtube.com/embed/peFXefI7nyM
How to Install a Flo-Well | 6:18 https://www.youtube.com/embed/JMrPnyz6rdI
How to Install a Catch Basin | 5:34 https://www.youtube.com/embed/De_bknlKkdk
How to Install a Flo-Well | 6:18 https://www.youtube.com/embed/JMrPnyz6rdI
How to Install a Catch Basin | 5:34 https://www.youtube.com/embed/De_bknlKkdk
How to Install a Flo-Well | 6:18 https://www.youtube.com/embed/JMrPnyz6rdI
How to Install a Catch Basin | 5:34 https://www.youtube.com/embed/De_bknlKkdk
How to Install a Pro Series Channel Drain | 10:21 https://www.youtube.com/embed/cIdbmTdOjaY
How to Install a Flo-Well | 6:18 https://www.youtube.com/embed/JMrPnyz6rdI
How to Install a Pro Series Channel Drain | 10:21 https://www.youtube.com/embed/cIdbmTdOjaY
How to Install a Flo-Well | 6:18 https://www.youtube.com/embed/JMrPnyz6rdI
How to Install a Spee-D Channel Drain | 9:02 https://www.youtube.com/embed/peFXefI7nyM
How to Install EZ-Drain | 4:52 https://www.youtube.com/embed/j1Kr_oUqdRw
How to Install a Catch Basin | 5:34 https://www.youtube.com/embed/De_bknlKkdk
How to Install a Flo-Well | 6:18 https://www.youtube.com/embed/JMrPnyz6rdI
How to Install a Catch Basin | 5:34 https://www.youtube.com/embed/De_bknlKkdk
How to Install a Flo-Well | 6:18 https://www.youtube.com/embed/JMrPnyz6rdI
How to Install EZ-Drain | 4:52 https://www.youtube.com/embed/j1Kr_oUqdRw
How to Install a Flo-Well | 6:18 https://www.youtube.com/embed/JMrPnyz6rdI
How to Install a Spee-D Channel Drain | 9:02 https://www.youtube.com/embed/peFXefI7nyM
How to Install EZ-Drain | 4:52 https://www.youtube.com/embed/j1Kr_oUqdRw
How to Install a Flo-Well | 6:18 https://www.youtube.com/embed/JMrPnyz6rdI
How to Install EZ-Drain | 4:52 https://www.youtube.com/embed/j1Kr_oUqdRw
How to Install a Flo-Well | 6:18 https://www.youtube.com/embed/JMrPnyz6rdI
How to Install a Catch Basin | 5:34 https://www.youtube.com/embed/De_bknlKkdk
  • 1Lay out system, dig trenches and holes
  • 2Install Spee-D Channel Drain
  • 3Connect elbow to drain on channel
  • 4Install Flo-Well and EZ-Drain
  • 5Connect Flo-Well Surface Inlet
  • 6Install Pop-Up Emitter
  • 7Backfill and Replant
  • 1Lay out system, dig trenches and holes
  • 2Install Micro Channel Drain
  • 3Install Bottom Drain and connect elbow
  • 4Install Flo-Well and drain pipe
  • 5Connect Flo-Well Surface Inlet
  • 6Install Pop-Up Emitter
  • 7Backfill and Replant
  • 1Lay out system, dig trenches and holes
  • 2Install area drain
  • 3Install Pop-Up Emitter
  • 4Backfill and Replant
  • 1Lay out system, dig trenches and holes
  • 2Install Catch Basin beneath downspout
  • 3Install Flo-Well and EZ-Drain
  • 4Connect Flo-Well Surface Inlet
  • 5Install Pop-Up Emitter
  • 6Backfill and Replant
  • 1Lay out system, dig trenches and holes
  • 2Install Catch Basin beneath downspout
  • 3Install Flo-Well and drain pipe
  • 4Connect Flo-Well Surface Inlet
  • 5Install Pop-Up Emitter
  • 6Backfill and Replant
  • 1Lay out system, dig trenches and holes
  • 2Install Spee-D Basin beneath downspout
  • 3Install drain pipe and Pop-Up Emitter
  • 4Backfill and Replant
  • 1Lay out system, dig trenches and holes
  • 2Install 5" Pro Series Channel Drain
  • 3Connect elbow to drain on channel
  • 4Install Flo-Well and EZ-Drain
  • 5Connect Flo-Well Surface Inlet
  • 6Install Pop-Up Emitter
  • 7Backfill and Replant
  • 1Lay out system, dig trenches and holes
  • 2Install 3" Pro Series Channel Drain
  • 3Connect elbow to drain on channel
  • 4Install Flo-Well and drain pipe
  • 5Connect Flo-Well Surface Inlet
  • 6Install Pop-Up Emitter
  • 7Backfill and Replant
  • 1Lay out system, dig trenches and holes
  • 2Install Spee-D Channel Drain
  • 3Connect elbow to drain on channel
  • 4Install Pop-Up Emitter
  • 5Backfill and Replant
  • 1Lay out system and dig trench
  • 2Connect EZ-Drain and place in trench
  • 3Install Pop-up Adapter
  • 4Backfill and replant
  • 1Lay out system, dig trenches and holes
  • 2Install Catch Basin
  • 3Install Flo-Well and EZ-Drain
  • 4Connect Flo-Well Surface Inlet
  • 5Install Pop-Up Emitter
  • 6Backfill and Replant
  • 1Lay out system, dig trenches and holes
  • 2Install Spee-D Basin
  • 3Install Flo-Well and drain pipe
  • 4Connect Flo-Well Surface Inlet
  • 5Install Pop-Up Emitter
  • 6Backfill and Replant
  • 1Lay out system, dig trenches and holes
  • 2Install Atrium grate and drain pipe
  • 3Install Pop-Up Emitter
  • 4Backfill and Replant
  • 1Lay out system, dig trenches and holes
  • 2Connect EZ-Drain and place in trench
  • 3Install Flo-Well and EZ-Drain
  • 4Connect Flo-Well Surface Inlet
  • 5Install Pop-Up Emitter
  • 6Backfill and Replant
  • 1Lay out system, dig trenches and holes
  • 2Install Spee-D Channel Drain
  • 3Connect elbow to drain on channel
  • 4Install EZ-Drain and Flo-Well
  • 5Connect Flo-Well Surface Inlet
  • 6Install Pop-Up Emitter
  • 7Backfill and Replant
  • 1Lay out system, dig trenches and holes
  • 2Install Flo-Well and drain pipe
  • 3Connect Flo-Well Surface Inlet
  • 4Install Pop-Up Emitter
  • 5Backfill and Replant
  • 1Lay out system, dig trenches and holes
  • 2Install Flo-Well and EZ-Drain
  • 3Connect Flo-Well Surface Inlet
  • 4Install Pop-Up Emitter
  • 5Install Pop-Up Emitter
  • 6Backfill and Replant
  • 1Lay out system, dig trenches and holes
  • 2Install Flo-Well and drain pipe
  • 3Connect Flo-Well Surface Inlet
  • 4Install Pop-Up Emitter
  • 5Backfill and Replant
  • 1Lay out system, dig trenches and holes
  • 2Install area drain and drain pipe
  • 3Install Pop-Up Emitter
  • 4Backfill and Replant
  • 1Lay out system, dig trenches and holes
  • 2Connect EZ-Drain and place in trench
  • 3Install Flo-Well and EZ-Drain
  • 4Connect Flo-Well Surface Inlet
  • 5Install Pop-Up Emitter
  • 6Backfill and Replant
  • 1Lay out system, dig trenches and holes
  • 2Install Flo-Well and drain pipe
  • 3Connect Flo-Well Surface Inlet
  • 4Install Pop-Up Emitter
  • 5Backfill and Replant
  • 1Lay out system, dig trenches and holes
  • 2Install Spee-D basin
  • 3Install Pop-up Emitter
  • 4Backfill and replant
  • Lay out system, dig trenches and holes
    Dig trench for pipe, Spee-D Channel Drain, Flo-Well, and EZ-Drain. Dry fit (no glue) the entire drainage system from the Spee-D Channel Drain to the pop-up emitter.
    The Flo-Well and EZ-Drain should be installed at least 10 feet away from any existing structure. Measure and cut all pipe to necessary lengths. After completing each step, glue parts together.
    TIP: If installing the drain in an existing concrete area, a wet concrete saw will be required to cut the concrete prior to installation.
  • Install Spee-D Channel Drain
    Compact the soil where the Spee-D Channel Drain will be installed to prevent settling. The Spee-D Channel Drain should be installed a minimum of 1/8” below the finished grade of the surrounding surface. Connect the required number of Spee-D Channel Sections together using Spee-D Channel Drain Couplers.Place the Spee-D Channel Drain grates on the channel and screw in place. Place Spee-D Channel Drain End Caps at the end of the runs as needed.
  • Connect elbow to drain on channel
    Determine the way which the Spee-D Channel Drain will be drained (either via an End Outlet or Bottom Drain) and connect the appropriate drain pipe. Glue and connect elbows as needed. Continue drain pipe in the direction of where the Flo-Well will be installed.
  • Install Flo-Well and EZ-Drain
    Run drain pipe from the Spee-D Channel Drain to the Flo-Well. Knock out the appropriate holes in the side panels of the Flo-Well where the drain pipe and EZ-Drain will be installed. Assemble the Flo-Well using the interlocking side panels. Slide the Drain Pipe and EZ-Drain through the holes in the Flo-Well side panels.

    TIP: Lay the Flo-Well panels on bricks or other hard surfaces and use a hammer to knock out the holes in the side panels.
  • Connect Flo-Well Surface Inlet
    Knock out the center hole of the Flo-Well lid. Place the lid on the Flo-Well side panels then place the Flo-Well Surface Inlet onto the Flo-Well lid.
  • Install Pop-Up Emitter
    Using a Corrugated Pipe Adapter, connect the EZ-Drain to an elbow with a weep hole. The elbow should be installed with the weep hole on the horizontal side of the elbow. Slide the Pop-up Emitter onto the elbow. An additional length of pipe can be used between the elbow and Pop-Up Emitter to bring the Pop-up emitter to the surface. The Pop-Up Emitter fits on the bell or hub end of the pipe or a pipe coupler.

    TIP: To avoid damaging your Pop-Up Emitter with your lawn mower, raise the cutting level of the blades or avoid passing the mower over the Pop-Up Emitter.
  • Backfill and Replant
    Cover the Spee-D Channel Drain grate with tape and cement, or grout, the channel into place. Remove tape after concrete or grout is dry. Backfill trenches and replace any grass or plants that were removed.

    TIP: DO NOT BACKFILL WITH SOIL WITH HIGH CLAY CONTENT. Water must be able to easily pass through the backfilled soil.If you want see the shopping list, click Get Installation Instructions.
  • Lay out system, dig trenches and holes
    Dig trench for pipe, Micro Channel Drain, and Flo-Well. Dry fit (no glue) the entire drainage system from the Micro Channel Drain to the pop-up emitter. The Flo-Well should be installed at least 10 feet away from any existing structure. Measure and cut all pipe to necessary lengths. After completing each step, glue parts together.

    TIP: If installing the drain in an existing concrete area, a wet concrete saw will be required to cut the concrete prior installation.
  • Install Micro Channel Drain
    Compact the soil where the Micro Channel Drain will be installed to prevent settling. The Micro Channel Drain should be installed a minimum of 1/8” below the finished grade of the surrounding surface. Connect the required number of Micro Channel Sections together using Micro Channel Drain Couplers. Place Micro Channel Drain End Caps at the end of the runs.
  • Install Bottom Drain and connect elbow
    Install the Micro Channel Drain Bottom Outlet where the channel will be drained and connect the 1-1/2” schedule 40 elbow. If you require the drain pipe to be lower, connect a 1-1/2” schedule 40 coupler to the bottom drain outlet. Glue and connect elbows as needed. Continue drain pipe in the direction of where the Flo-Well will be installed.
  • Install Flo-Well and drain pipe
    Run drain pipe from the Micro Channel Drain to the Flo-Well. Knock out the appropriate holes in the side panels of the Flo-Well where the drain pipe will be installed. Assemble the Flo-Well using the interlocking side panels. Slide the drain pipe through the hole in the Flo-Well side panels.

    TIP: Lay the Flo-Well panels on bricks or other hard surfaces and use a hammer to knock out the holes in the side panels.
  • Connect Flo-Well Surface Inlet
    Knock out the center hole of the Flo-Well lid. Place the lid on the Flo-Well side panels then place the Flo-Well Surface Inlet onto the Flo-Well lid.
  • Install Pop-Up Emitter
    Connect the drain pipe exiting the Flo-Well to an elbow with a weep hole. The elbow should be installed with the weep hole on the horizontal side of the elbow. Slide the Pop-up Emitter onto the elbow. An additional length of pipe can be used between the elbow and Pop-Up Emitter to bring the Pop-up emitter to the surface. The Pop-Up Emitter fits on the bell or hub end of the pipe or a pipe coupler.

    TIP: To avoid damaging your Pop-Up Emitter with your lawn mower, raise the cutting level of the blades or avoid passing the mower over the Pop-Up Emitter
  • Backfill and Replant
    Cover the Micro Channel Drain grate with tape and cement or grout the channel in place. Remove tape after concrete or grout is dry. Backfill trenches and replace any grass or plants that were removed.If you want see the shopping list, click Get Installation Instructions.
  • Lay out system, dig trenches and holes
    Dig trench for drain pipe. Dry fit (no glue) the entire drainage system from the atrium grate to the pop-up emitter. Measure and cut all pipe to necessary lengths. After completing each step, glue parts together.

    TIP: If installing the drain in an existing concrete area, a wet concrete saw will be required to cut the concrete prior installation.
  • Install area drain
    The flat area drain should be installed in a low spot in your patio or pool deck. Slide the grate into the drain pipe. Apply glue to an elbow and drain pipe and connect the elbow. Glue a section of drain pipe to the other end of the elbow.
  • Install Pop-Up Emitter
    Connect the drain pipe to an elbow with a weep hole. The elbow should be installed with the weep hole on the horizontal side of the elbow. Slide the Pop-up Emitter onto the elbow. An additional length of pipe can be used between the elbow and Pop-Up Emitter to bring the Pop-up emitter to the surface. The Pop-Up Emitter fits on the bell or hub end of the pipe or a pipe coupler.

    TIP: To avoid damaging your Pop-Up Emitter with your lawn mower, raise the cutting level of the blades or avoid passing the mower over the Pop-Up Emitter
  • Backfill and Replant
    Backfill and replace any grass or plants that were removed.If you want see the Shopping list, Click “Email or Download”.
  • Lay out system, dig trenches and holes
    Dig holes and trench for pipe, catch basin, Flo-Well, and EZ-Drain. Dry fit (no glue) the entire drainage system from the catch basin to the pop-up emitter. The Flo-Well and EZ-Drain should be installed at least 10 feet away from any existing structure. Measure and cut all pipe to necessary lengths. After completing each step, glue parts together.

    TIP: If installing the drain in an existing concrete area, a wet concrete saw will be required to cut the concrete prior installation.
  • Install Catch Basin beneath downspout
    Before beginning your installation, check if your downspout has a downspout elbow connected. If not, connect a downspout elbow to your downspout. If needed, connect the Catch Basin Universal Outlets to the Catch Basin by inserting the Outlet into the Catch Basin and twisting to lock in place. One of the outlets should have a plug. This plug must be inserted into the outlet that will not have a drain pipe connected. The Catch Basin can be used to clean out any debris that may enter the system and also serves as an inlet for surface water. It should be installed in the ground directly beneath the downspout elbow to catch all water draining from the downspout. Place the atrium grate on the Catch Basin and screw in place. Connect the drain pipe to the Catch Basin using the Catch Basin Universal Outlet.
    TIP: Dig the hole for the basin an additional 6” deeper than needed. Place 6” of gravel in the bottom of the hole. Drill small holes in the bottom of the basin to prevent standing water in the bottom of the basin.
  • Install Flo-Well and EZ-Drain
    Run drain pipe from other end of Catch Basin to the Flo-Well. Knock out the appropriate holes in the side panels of the Flo-Well where the drain pipe and EZ-Drain will be installed. Assemble the Flo-Well using the interlocking side panels. Slide the Drain Pipe and EZ-Drain through the holes in the Flo-Well side panels.

    TIP: Lay the Flo-Well panels on bricks or other hard surfaces and use a hammer to knock out the holes in the side panels.
  • Connect Flo-Well Surface Inlet
    Knock out the center hole of the Flo-Well lid. Place the lid on the Flo-Well side panels then place the Flo-Well Surface Inlet onto the Flo-Well lid.
  • Install Pop-Up Emitter
    Using a Corrugated Pipe Adapter, connect the EZ-Drain to an elbow with a weep hole. The elbow should be installed with the weep hole on the horizontal side of the elbow. Slide the Pop-up Emitter onto the elbow. An additional length of pipe can be used to bring Pop-up emitter to the surface.

    TIP: To avoid damaging your Pop-Up Emitter with your lawn mower, raise the cutting level of the blades or avoid passing the mower over the Pop-Up Emitter
  • Backfill and Replant
    Backfill and replace any grass or plants that were removed.

    TIP: DO NOT BACKFILL WITH SOIL WITH HIGH CLAY CONTENT. Water must be able to easily pass through the backfilled soil.If you want see the shopping list, click Get Installation Instructions.
  • Lay out system, dig trenches and holes
    Dig holes and trench for pipe, Catch Basin, and Flo-Well. Dry fit (no glue) the entire drainage system from the Catch Basin to the pop-up emitter. The Flo-Well should be installed at least 10 feet away from any existing structure. Measure and cut all pipe to necessary lengths. After completing each step, glue parts together.

    TIP: If installing the drain in an existing concrete area, a wet concrete saw will be required to cut the concrete prior installation.
  • Install Catch Basin beneath downspout
    Before beginning your installation, check if your downspout has a downspout elbow connected. If not, connect a downspout elbow to your downspout. If needed, connect the Catch Basin Universal Outlets to the Catch Basin by inserting the Outlet into the Catch Basin and twisting to lock in place. One of the outlets should have a plug. This plug must be inserted into the outlet that will not have a drain pipe connected. The Catch Basin can be used to clean out any debris that may enter the system and also serves as an inlet for surface water. It should be installed in the ground directly beneath the downspout elbow to catch all water draining from the downspout. Place the atrium grate on the Catch Basin and screw in place. Connect the drain pipe to the Catch Basin using the Catch Basin Universal Outlet.

    TIP: Dig the hole for the basin an additional 6” deeper than needed. Place 6” of gravel in the bottom of the hole. Drill small holes in the bottom of the basin to prevent standing water in the bottom of the basin.
  • Install Flo-Well and drain pipe
    Run drain pipe from other end of Catch Basin to the Flo-Well. Knock out the appropriate holes in the side panels of the Flo-Well where the drain pipe will enter and exit. Assemble the Flo-Well using the interlocking side panels. Slide the Drain Pipe through the holes in the Flo-Well side panels.

    TIP: Lay the Flo-Well panels on bricks or other hard surfaces and use a hammer to knock out the holes in the side panels.
  • Connect Flo-Well Surface Inlet
    Knock out the center hole of the Flo-Well lid. Place the lid on the Flo-Well side panels then place the Flo-Well Surface Inlet onto the Flo-Well lid.
  • Install Pop-Up Emitter
    Connect the drain pipe exiting the Flo-Well to an elbow with a weep hole. The elbow should be installed with the weep hole on the horizontal side of the elbow. Slide the Pop-up Emitter onto the elbow. An additional length of pipe can be used to bring Pop-up emitter to the surface.

    TIP: To avoid damaging your Pop-Up Emitter with your lawn mower, raise the cutting level of the blades or avoid passing the mower over the Pop-Up Emitter
  • Backfill and Replant
    Backfill and replace any grass or plants that were removed.If you want see the shopping list, click Get Installation Instructions.
  • Lay out system, dig trenches and holes
    Dig trench for drain pipe. Dry fit (no glue) the entire drainage system from the Spee-D Basin to the pop-up emitter. Measure and cut all pipe to necessary lengths. After completing each step, glue parts together.

    TIP: If installing the drain in an existing concrete area, a wet concrete saw will be required to cut the concrete prior installation.
  • Install Spee-D Basin beneath downspout
    Before beginning your installation, check if your downspout has a downspout elbow connected. If not, connect a downspout elbow to your downspout. The Spee-D Basin should be installed in the ground directly beneath the downspout elbow to catch all water draining from the downspout. Connect the drain pipe to the Spee-D Basin. The Spee-D Basin can be used to clean out any debris that may enter the system and also serves as an inlet for surface water. Once installation is complete, place the atrium grate on the Spee-D Basin. A 6” SDR-35 drain pipe can be inserted into the Spee-D basin to raise the elevation of the atrium grate. The Atrium grate will also fit into the bell or hub end of the pipe or on a 6” sewer and drain coupler.

    TIP: Dig the hole for the basin an additional 6” deeper than needed. Place 6” of gravel in the bottom of the hole. Drill small holes in the bottom of the basin to prevent standing water in the bottom of the basin.
  • Install drain pipe and Pop-Up Emitter
    Connect the drain pipe to an elbow with a weep hole. The elbow should be installed with the weep hole on the horizontal side of the elbow. Slide the Pop-up Emitter onto the elbow. An additional length of pipe can be used to bring Pop-up emitter to the surface.

    TIP: To avoid damaging your Pop-Up Emitter with your lawn mower, raise the cutting level of the blades or avoid passing the mower over the Pop-Up Emitter
  • Backfill and Replant
    Backfill and replace any grass or plants that were removed.If you want see the shopping list, click Get Installation Instructions.
  • Lay out system, dig trenches and holes
    Dig trench for drain pipe,5" Pro Series Channel Drain, Flo-Well, and EZ-Drain. Dry fit (no glue) the entire drainage system from the 5" Pro Series Channel Drain to the pop-up emitter. The Flo-Well and EZ-Drain should be installed at least 10 feet away from any existing structure. Measure and cut all pipe to necessary lengths. After completing each step, glue parts together.

    TIP: If installing the drain in an existing concrete area, a wet concrete saw will be required to cut the concrete prior installation.
  • Install 5" Pro Series Channel Drain
    A minimum of 4-inches of concrete should surround the channel where vehicular traffic will pass over the channel. Additional concrete and stronger grates are required for heavier loads. Please follow installation instructions included with the channel when installing the channel drain. The 5" Pro Series Channel Drain should be installed a minimum of 1/4" below the finished grade of the surrounding surface. Connect the required number of channel sections together using interlocking end connections. Place the grates on the channel and screw in place. Install end caps at the end of the runs as needed.
  • Connect elbow to drain on channel
    Determine the way in which the channel drain will be drained (either via an End Outlet or Bottom Drain) and connect the appropriate drain pipe. Glue and connect elbows as needed. Continue drain pipe in direction of where the Flo-Well will be installed.
  • Install Flo-Well and EZ-Drain
    Run drain pipe from the 5" Pro Series Channel Drain to the Flo-Well. Knock out the appropriate holes in the side panels of the Flo-Well where the drain pipe and EZ-Drain will be installed. Assemble the Flo-Well using the interlocking side panels. Slide the Drain Pipe and EZ-Drain through the holes in the Flo-Well side panels.

    TIP: Lay the Flo-Well panels on bricks or other hard surfaces and use a hammer to knock out the holes in the side panels.
  • Connect Flo-Well Surface Inlet
    Knock out the center hole of the Flo-Well lid. Place the lid on the Flo-Well side panels then place the Flo-Well Surface Inlet onto the Flo-Well lid.
  • Install Pop-Up Emitter
    Using a Corrugated Pipe Adapter, connect the EZ-Drain to an elbow with a weep hole. The elbow should be installed with the weep hole on the horizontal side of the elbow. Slide the Pop-up Emitter onto the elbow. An additional length of pipe can be used between the elbow and Pop-Up Emitter to bring the Pop-up emitter to the surface. The Pop-Up Emitter fits on the bell or hub end of the pipe or a pipe coupler.

    TIP: To avoid damaging your Pop-Up Emitter with your lawn mower, raise the cutting level of the blades or avoid passing the mower over the Pop-Up Emitter
  • Backfill and Replant
    Cover the channel drain grates with tape and pour concrete. Finish concrete and remove tape when concrete is dry. Backfill trenches and replace any grass or plants that were removed.

    TIP: DO NOT BACKFILL WITH SOIL WITH HIGH CLAY CONTENT. Water must be able to easily pass through the backfilled soil.If you want see the shopping list, click Get Installation Instructions.
  • Lay out system, dig trenches and holes
    Dig trench for drain pipe, 3” Pro Series Channel Drain, and Flo-Well. Dry fit (no glue) the entire drainage system from the 3” Pro Series Channel Drain to the pop-up emitter. The Flo-Well should be installed at least 10 feet away from any existing structure. Measure and cut all pipe to necessary lengths. After completing each step, glue parts together.

    TIP: If installing the drain in an existing concrete area, a wet concrete saw will be required to cut the concrete prior installation.
  • Install 3” Pro Series Channel Drain
    A minimum of 4-inches of concrete should surround the channel where vehicular traffic will pass over the channel. Please follow installation instructions included with the channel when installing the channel drain. The 3” Pro Series Channel Drain should be installed a minimum of 1/4” below the finished grade of the surrounding surface. Connect the required number of channel sections together using the tongue and groove end connections. Place the grates on the channel and screw in place. Install end caps at the end of the runs as needed.
  • Connect elbow to drain on channel
    Determine the way which the channel drain will be drained (either via an End Outlet or Bottom Drain) and connect the appropriate drain pipe. Glue and connect elbows as needed. Continue drain pipe in the direction of where the Flo-Well will be installed.
  • Install Flo-Well and drain pipe
    Run drain pipe from the 3” Pro Series Channel Drain to the Flo-Well. Knock out the appropriate holes in the side panels of the Flo-Well where the drain pipe will enter and exit. Assemble the Flo-Well using the interlocking side panels. Slide the Drain Pipe through the holes in the Flo-Well side panels.

    TIP: Lay the Flo-Well panels on bricks or other hard surfaces and use a hammer to knock out the holes in the side panels.
  • Connect Flo-Well Surface Inlet
    Knock out the center hole of the Flo-Well lid. Place the lid on the Flo-Well side panels then place the Flo-Well Surface Inlet onto the Flo-Well lid.
  • Install Pop-Up Emitter
    Connect the drain pipe exiting the Flo-Well to an elbow with a weep hole. The elbow should be installed with the weep hole on the horizontal side of the elbow. Slide the Pop-up Emitter onto the elbow. An additional length of pipe can be used between the elbow and Pop-Up Emitter to bring the Pop-up emitter to the surface. The Pop-Up Emitter fits on the bell or hub end of the pipe or a pipe coupler.

    TIP: To avoid damaging your Pop-Up Emitter with your lawn mower, raise the cutting level of the blades or avoid passing the mower over the Pop-Up Emitter
  • Backfill and Replant
    Cover the channel drain grates with tape and pour concrete. Finish concrete and remove tape when concrete is dry. Backfill trenches and replace any grass or plants that were removed.If you want see the shopping list, click Get Installation Instructions.
  • Lay out system, dig trenches and holes
    Dig trench for drain pipe, 3” Pro Series Channel Drain, and Flo-Well. Dry fit (no glue) the entire drainage system from the 3” Pro Series Channel Drain to the pop-up emitter. The Flo-Well should be installed at least 10 feet away from any existing structure. Measure and cut all pipe to necessary lengths. After completing each step, glue parts together.

    TIP: If installing the drain in an existing concrete area, a wet concrete saw will be required to cut the concrete prior installation.
  • Install Spee-D Channel Drain
    A minimum of 4-inches of concrete should surround the channel where vehicular traffic will pass over the channel. Please follow installation instructions included with the channel when installing the channel drain. The Spee-D Channel Drain should be installed a minimum of 1/4” below the finished grade of the surrounding surface. Connect the required number of channel sections together using the Spee-D Channel Couplers. Place the grates on the channel and screw in place. Install end caps at the end of the runs as needed.
  • Connect elbow to drain on channel
    Determine the way which the channel drain will be drained (either via an End Outlet or Bottom Drain) and connect the appropriate drain pipe. Glue and connect elbows as needed. Continue drain pipe in the direction of where the Pop-Up Emitter will be installed.
  • Install Pop-Up Emitter
    Connect the drain pipe exiting the Flo-Well to an elbow with a weep hole. The elbow should be installed with the weep hole on the horizontal side of the elbow. Slide the Pop-up Emitter onto the elbow. An additional length of pipe can be used between the elbow and Pop-Up Emitter to bring the Pop-up emitter to the surface. The Pop-Up Emitter fits on the bell or hub end of the pipe or a pipe coupler.

    TIP: To avoid damaging your Pop-Up Emitter with your lawn mower, raise the cutting level of the blades or avoid passing the mower over the Pop-Up Emitter
  • Backfill and Replant
    Cover the channel drain grates with tape and pour concrete. Finish concrete and remove tape when concrete is dry. Backfill trenches and replace any grass or plants that were removed.If you want see the shopping list, click Get Installation Instructions.
  • Lay out system, dig trenches and holes
    Lay out system, dig trenches and holes & Dig trench to top of foundation footer or bottom of basement wall.
  • Connect EZ-Drain and place in trench
    Connect the EZ-Drain sections together using internal corrugated couplings and place the EZ-Drain bundles next to the footing or wall. Bundles can be held in place by wedging the bundles between a wooden stake and the foundation or basement wall. Additional aggregate only bundles can be stacked on the piped section as needed. Aggregate only bundles allow water to easily reach the piped sections so it can be quickly carried away.
  • Install Pop-up Adapter
    Using a corrugated pipe adapter, connect a drain pipe to one of the piped sections of EZ-Drain to create a discharge point. Connect the drain pipe to an elbow with a weep hole. The elbow should be installed with the weep hole on the horizontal side of the elbow. Slide the Pop-up Emitter onto the elbow. An additional length of pipe can be used between the elbow and Pop-Up Emitter to bring the Pop-up emitter to the surface. The Pop-Up Emitter fits on the bell or hub end of the pipe or a pipe coupler.

    TIP: To avoid damaging your Pop-Up Emitter with your lawn mower, raise the cutting level of the blades or avoid passing the mower over the Pop-Up Emitter
  • Backfill and replant
    Backfill with permeable soil and replace any grass or plants that were removed.

    TIP: DO NOT BACKFILL WITH SOIL WITH HIGH CLAY CONTENT. Water must be able to easily pass through the backfilled soil.If you want see the shopping list, click Get Installation Instructions.
  • Lay out system, dig trenches and holes
    Dig holes and trench for pipe, catch basin, Flo-Well, and EZ-Drain. Dry fit (no glue) the entire drainage system from the Catch Basin to the pop-up emitter. The Flo-Well and EZ-Drain should be installed at least 10 feet away from any existing structure. Measure and cut all pipe to necessary lengths. After completing each step, glue parts together.
  • Install Catch Basin
    The Catch Basin should be installed in a low spot in your landscape planter area. If needed, connect the Catch Basin Universal Outlets to the Catch Basin by inserting the Outlet into the Catch Basin and twisting to lock in place. Place the atrium on the Catch Basin and screw in place. Connect a drain pipe to the Catch Basin using the Catch Basin Universal Outlet.

    TIP: Dig the hole for the basin an additional 6” deeper than needed. Place 6” of gravel in the bottom of the hole. Drill small holes in the bottom of the basin to prevent standing water in the bottom of the basin.
  • Install Flo-Well and EZ-Drain
    Run drain pipe from the other end of the Catch Basin to the Flo-Well. Knock out the appropriate holes in the side panels of the Flo-Well where the drain pipe and EZ-Drain will be installed. Assemble the Flo-Well using the interlocking side panels. Slide the Drain Pipe and EZ-Drain through the holes in the Flo-Well side panels.

    TIP: Lay the Flo-Well panels on bricks or other hard surfaces and use a hammer to knock out the holes in the side panels.
  • Connect Flo-Well Surface Inlet
    Knock out the center hole of the Flo-Well lid. Place the lid on the Flo-Well side panels then place the Flo-Well Surface Inlet onto the Flo-Well lid.
  • Install Pop-Up Emitter
    Using a Corrugated Pipe Adapter, connect EZ-Drain to an elbow with a weep hole. The elbow should be installed with the weep hole on the horizontal side of the elbow. Slide the Pop-up Emitter onto the elbow. An additional length of pipe can be used between the elbow and Pop-Up Emitter to bring the Pop-up emitter to the surface. The Pop-Up Emitter fits on the bell or hub end of the pipe or a pipe coupler.

    TIP: To avoid damaging your Pop-Up Emitter with your lawn mower, raise the cutting level of the blades or avoid passing the mower over the Pop-Up Emitter
  • Backfill and Replant
    Backfill and replace any grass or plants that were removed.If you want see the shopping list, click Get Installation Instructions.
  • Lay out system, dig trenches and holes
    Dig holes and trench for pipe, Spee-D Basin, and Flo-Well. Dry fit (no glue) the entire drainage system from the Spee-D Basin to the pop-up emitter. The Flo-Well should be installed at least 10 feet away from any existing structure. Measure and cut all pipe to necessary lengths. After completing each step, glue parts together.
  • Install Spee-D Basin
    The Spee-D Basin should be installed in a low spot in your landscape planter area. Connect a drain pipe to the Spee-D Basin. Place the atrium grate on the Spee-D Basin. A 6” SDR-35 drain pipe can be inserted into the Spee-D basin to raise the elevation of the atrium grate.

    TIP: Dig the hole for the basin an additional 6” deeper than needed. Place 6” of gravel in the bottom of the hole. Drill small holes in the bottom of the basin to prevent standing water in the bottom of the basin.
  • Install Flo-Well and drain pipe
    Run drain pipe from other end of Spee-D Basin to the Flo-Well. Knock out the appropriate holes in the side panels of the Flo-Well where the drain pipe will enter and exit. Assemble the Flo-Well using the interlocking side panels. Slide the Drain Pipe through the holes in the Flo-Well side panels.

    TIP: Lay the Flo-Well panels on bricks or other hard surfaces and use a hammer to knock out the holes in the side panels.
  • Connect Flo-Well Surface Inlet
    Knock out the center hole of the Flo-Well lid. Place the lid on the Flo-Well side panels then place the Flo-Well Surface Inlet onto the Flo-Well lid.
  • Install Pop-Up Emitter
    Connect the drain pipe exiting the Flo-Well to an elbow with a weep hole. The elbow should be installed with the weep hole on the horizontal side of the elbow. Slide the Pop-up Emitter onto the elbow. An additional length of pipe can be used between the elbow and Pop-Up Emitter to bring the Pop-up emitter to the surface. The Pop-Up Emitter fits on the bell or hub end of the pipe or a pipe coupler.

    TIP: To avoid damaging your Pop-Up Emitter with your lawn mower, raise the cutting level of the blades or avoid passing the mower over the Pop-Up Emitter
  • Backfill and Replant
    Backfill and replace any grass or plants that were removed.If you want see the shopping list, click Get Installation Instructions.
  • Lay out system, dig trenches and holes
    Dig trench for drain pipe. Dry fit (no glue) the entire drainage system from the atrium grate to the pop-up emitter. Measure and cut all pipe to necessary lengths. After completing each step, glue parts together.
  • Install Atrium grate and drain pipe
    The atrium grate should be installed in a low spot in your landscape planter area. Slide the atrium grate into the drain pipe. Apply glue to an elbow and drain pipe and connect the elbow. Glue a section of drain pipe to the other end of the elbow
  • Install Pop-Up Emitter
    Connect the drain pipe to an elbow with a weep hole. The elbow should be installed with the weep hole on the horizontal side of the elbow. Slide the Pop-up Emitter onto the elbow. An additional length of pipe can be used between the elbow and Pop-Up Emitter to bring the Pop-up emitter to the surface. The Pop-Up Emitter fits on the bell or hub end of the pipe or a pipe coupler.

    TIP: To avoid damaging your Pop-Up Emitter with your lawn mower, raise the cutting level of the blades or avoid passing the mower over the Pop-Up Emitter
  • Backfill and Replant
    Backfill and replace any grass or plants that were removed.If you want see the shopping list, click Get Installation Instructions.
  • Lay out system, dig trenches and holes
    Dig trench for the EZ-Drain and Flo-Well. Dry fit (no glue) the entire drainage system from the EZ-Drain to the Pop-Up Emitter. The Flo-Well should be installed at least 10 feet away from any existing structure. Measure and cut all pipe to necessary lengths. After completing each step, glue parts together.
  • Connect EZ-Drain and place in trench
    Connect sections of EZ-Drain with internal corrugated couplers and place an end cap on the end that does not connect to the Flo-Well. Lay EZ-Drain pipe in the trench.
  • Install Flo-Well and EZ-Drain
    Knock out the appropriate holes in the side panels of the Flo-Well where the EZ-Drain will be installed. Assemble the Flo-Well using the interlocking side panels. Slide the drain pipe through the hole in the Flo-Well side panels.

    TIP: Lay the Flo-Well panels on bricks or other hard surfaces and use a hammer to knock out the holes in the side panels.
  • Connect Flo-Well Surface Inlet
    Knock out the center hole of the Flo-Well lid. Place the lid on the Flo-Well side panels then place the Flo-Well Surface Inlet onto the Flo-Well lid.
  • Install Pop-Up Emitter
    Using a Corrugated Pipe Adapter, connect the EZ-Drain to an elbow with a weep hole. The elbow should be installed with the weep hole on the horizontal side of the elbow. Slide the Pop-up Emitter onto the elbow. An additional length of pipe can be used between the elbow and Pop-Up Emitter to bring the Pop-up emitter to the surface. The Pop-Up Emitter fits on the bell or hub end of the pipe or a pipe coupler.

    TIP: To avoid damaging your Pop-Up Emitter with your lawn mower, raise the cutting level of the blades or avoid passing the mower over the Pop-Up Emitter
  • Backfill and Replant
    Backfill trenches and replace any grass or plants that were removed.If you want see the shopping list, click Get Installation Instructions.
  • Lay out system, dig trenches and holes
    Dig trench for pipe, Spee-D Channel Drain, Flo-Well, and EZ-Drain. Dry fit (no glue) the entire drainage system from the Spee-D Channel Drain to the pop-up emitter. The Flo-Well and EZ-Drain should be installed at least 10 feet away from any existing structure. Measure and cut all pipe to necessary lengths. After completing each step, glue parts together.
  • Install Spee-D Channel Drain
    Compact the soil where the Spee-D Channel Drain will be installed to prevent settling. The Spee-D Channel Drain should be installed a minimum of 1/8” below the finished grade of the walkway. Connect the required number of Spee-D Channel Sections together using Spee-D Channel Drain Couplers. Place the Spee-D Channel Drain grates on the channel and screw in place. Place Spee-D Channel Drain End Caps at the end of the runs as needed. The Spee-D Channel Drain sections and grates can be cut at any angle to fit bends in the walkway.

    TIP: Dig the hole for the basin an additional 6” deeper than needed. Place 6” of gravel in the bottom of the hole. Drill small holes in the bottom of the basin to prevent standing water in the bottom of the basin.
  • Connect elbow to drain on channel
    Determine the way which the Spee-D Channel Drain will be drained (either via an End Outlet or Bottom Drain) and connect the appropriate drain pipe. Glue and connect elbows as needed. Continue drain pipe in the direction of where the Flo-Well will be installed.
  • Install EZ-Drain and Flo-Well
    Run drain pipe from the Spee-D Channel Drain to the Flo-Well. Knock out the appropriate holes in the side panels of the Flo-Well where the drain pipe and EZ-Drain will be installed. Assemble the Flo-Well using the interlocking side panels. Slide the Drain Pipe and EZ-Drain through the holes in the Flo-Well side panels.

    TIP: Lay the Flo-Well panels on bricks or other hard surfaces and use a hammer to knock out the holes in the side panels.
  • Connect Flo-Well Surface Inlet
    Knock out the center hole of the Flo-Well lid. Place the lid on the Flo-Well side panels then place the Flo-Well Surface Inlet onto the Flo-Well lid.
  • Install Pop-Up Emitter
    Using a Corrugated Pipe Adapter, connect the EZ-Drain to an elbow with a weep hole. The elbow should be installed with the weep hole on the horizontal side of the elbow. Slide the Pop-up Emitter onto the elbow. An additional length of pipe can be used between the elbow and Pop-Up Emitter to bring the Pop-up emitter to the surface. The Pop-Up Emitter fits on the bell or hub end of the pipe or a pipe coupler.

    TIP: To avoid damaging your Pop-Up Emitter with your lawn mower, raise the cutting level of the blades or avoid passing the mower over the Pop-Up Emitter
  • Backfill and Replant
    Cover the Spee-D Channel Drain grate with tape. Compact the dirt on one side of the channel and cement or grout the channel side adjacent to the walkway. Remove tape after concrete or grout is dry. Backfill trenches and replace any grass or plants that were removed.

    TIP: DO NOT BACKFILL WITH SOIL WITH HIGH CLAY CONTENT. Water must be able to easily pass through the backfilled soil.If you want see the shopping list, click Get Installation Instructions.
  • Lay out system, dig trenches and holes
    Dig holes and trench for pipe and Flo-Well. Dry fit (no glue) the entire drainage system from the Flo-Well to the pop-up emitter. The Flo-Well should be installed at least 10 feet away from any existing structure. Measure and cut all pipe to necessary lengths. After completing each step, glue parts together.
  • Install Flo-Well and drain pipe
    The Flo-Well should be installed in a low spot adjacent to the walkway. Knock out the appropriate holes in the side panels of the Flo-Well where the drain pipe will be installed. Assemble the Flo-Well using the interlocking side panels. Slide the drain pipe through the hole in the Flo-Well side panel.

    TIP: Lay the Flo-Well panels on bricks or other hard surfaces and use a hammer to knock out the holes in the side panels.
  • Connect Flo-Well Surface Inlet
    Knock out the center hole of the Flo-Well lid. Place the lid on the Flo-Well side panels then place the Flo-Well Surface Inlet onto the Flo-Well lid.
  • Install Pop-Up Emitter
    Connect the drain pipe exiting the Flo-Well to an elbow with a weep hole. The elbow should be installed with the weep hole on the horizontal side of the elbow. Slide the Pop-up Emitter onto the elbow. An additional length of pipe can be used between the elbow and Pop-Up Emitter to bring the Pop-up emitter to the surface. The Pop-Up Emitter fits on the bell or hub end of the pipe or a pipe coupler.

    TIP: To avoid damaging your Pop-Up Emitter with your lawn mower, raise the cutting level of the blades or avoid passing the mower over the Pop-Up Emitter
  • Backfill and Replant
    Backfill and replace any grass or plants that were removed.If you want see the shopping list, click Get Installation Instructions.
  • Lay out system, dig trenches and holes
    Dig holes and trench for pipe, Flo-Well, and EZ-Drain. Dry fit (no glue) the entiredrainage system from the Flo-Well to the pop-up emitter. The Flo-Well and EZ-Drain should be installed at least 10 feet away from any existing structure. Measure and cut all pipe to necessary lengths. After completing each step, glue parts together.
  • Install Flo-Well and EZ-Drain
    The Flo-Well should be installed in a low spot in your yard. Knock out the appropriate holes in the side panels of the Flo-Well where the EZ-Drain will be installed. Assemble the Flo-Well using the interlocking side panels. Slide the EZ-Drain through the hole in the Flo-Well side panel.

    TIP: Lay the Flo-Well panels on bricks or other hard surfaces and use a hammer to knock out the holes in the side panels.
  • Connect Flo-Well Surface Inlet
    Knock out the center hole of the Flo-Well lid. Place the lid on the Flo-Well side panels then place the Flo-Well Surface Inlet onto the Flo-Well lid.
  • Install Pop-Up Emitter
    Using a Corrugated Pipe Adapter, connect the EZ-Drain to an elbow with a weep hole. The elbow should be installed with the weep hole on the horizontal side of the elbow. Slide the Pop-up Emitter onto the elbow. An additional length of pipe can be used between the elbow and Pop-Up Emitter to bring the Pop-up emitter to the surface. The Pop-Up Emitter fits on the bell or hub end of the pipe or a pipe coupler.

    TIP: To avoid damaging your Pop-Up Emitter with your lawn mower, raise the cutting level of the blades or avoid passing the mower over the Pop-Up Emitter
  • Backfill and Replant
    Backfill and replace any grass or plants that were removed.

    TIP: DO NOT BACKFILL WITH SOIL WITH HIGH CLAY CONTENT. Water must be able to easily pass through the backfilled soil.If you want see the shopping list, click ?Get Installation Instructions?.
  • Lay out system, dig trenches and holes
    Dig holes and trench for drain pipe and Flo-Well. Dry fit (no glue) the entire drainage system from the Flo-Well to the pop-up emitter. The Flo-Well should be installed at least 10 feet away from any existing structure. Measure and cut all pipe to necessary lengths. After completing each step, glue parts together.
  • Install Flo-Well and drain pipe
    The Flo-Well should be installed in a low spot in your yard. Knock out the appropriate holes in the side panels of the Flo-Well where the drain pipe will be installed. Assemble the Flo-Well using the interlocking side panels. Slide the drain pipe through the hole in the Flo-Well side panel.

    TIP: Lay the Flo-Well panels on bricks or other hard surfaces and use a hammer to knock out the holes in the side panels.
  • Connect Flo-Well Surface Inlet
    Knock out the center hole of the Flo-Well lid. Place the lid on the Flo-Well side panels and then place the Flo-Well Surface Inlet onto the Flo-Well lid.
  • Install Pop-Up Emitter
    Connect the drain pipe exiting the Flo-Well to an elbow with a weep hole. The elbow should be installed with the weep hole on the horizontal side of the elbow. Slide the Pop-up Emitter onto the elbow. An additional length of pipe can be used between the elbow and Pop-Up Emitter to bring the Pop-up emitter to the surface. The Pop-Up Emitter fits on the bell or hub end of the pipe or a pipe coupler.

    TIP: To avoid damaging your Pop-Up Emitter with your lawn mower, raise the cutting level of the blades or avoid passing the mower over the Pop-Up Emitter
  • Backfill and Replant
    Backfill and replace any grass or plants that were removed.If you want see the shopping list, click ?Get Installation Instructions?.
  • Lay out system, dig trenches and holes
    Dig trench for drain pipe. Dry fit (no glue) the entire drainage system from the atrium grate to the pop-up emitter. Measure and cut all pipe to necessary lengths. After completing each step, glue parts together.
  • Install area drain and drain pipe
    The flat area drain should be installed in a low spot in your landscape planter area. Slide the grate into the drain pipe. Apply glue to an elbow and drain pipe and connect the elbow. Glue a section of drain pipe to the other end of the elbow.
  • Install Pop-Up Emitter
    Connect the drain pipe to an elbow with a weep hole. The elbow should be installed with the weep hole on the horizontal side of the elbow. Slide the Pop-up Emitter onto the elbow. An additional length of pipe can be used between the elbow and Pop-Up Emitter to bring the Pop-up emitter to the surface. The Pop-Up Emitter fits on the bell or hub end of the pipe or a pipe coupler.

    TIP: To avoid damaging your Pop-Up Emitter with your lawn mower, raise the cutting level of the blades or avoid passing the mower over the Pop-Up Emitter
  • Backfill and Replant
    Backfill and replace any grass or plants that were removedIf you want see the shopping list, click ?Get Installation Instructions?.
  • Lay out system, dig trenches and holes
    Dig trench for EZ-Drain and Flo-Well along the property line where the runoff is draining onto your property. Flo-Well(s) should be installed under the areas where the runoff is collecting. Dry fit (no glue) the entire drainage system from the EZ-Drain to the Pop-Up Emitter. The Flo-Well should be installed at least 10 feet away from any existing structure. Measure and cut all pipe to necessary lengths. After completing each step, glue parts together.
  • Connect EZ-Drain and place in trench
    Connect sections of EZ-Drain with internal corrugated couplers and place an end cap on the end that does not connect to the Flo-Well. Lay EZ-Drain pipe in the trench.
  • Install Flo-Well and EZ-Drain
    Knock out the appropriate holes in the side panels of the Flo-Well where the EZ-Drain will be installed. Assemble the Flo-Well using the interlocking side panels. Slide the drain pipe through the hole in the Flo-Well side panels.

    TIP: Lay the Flo-Well panels on bricks or other hard surfaces and use a hammer to knock out the holes in the side panels.
  • Connect Flo-Well Surface Inlet
    Knock out the center hole of the Flo-Well lid. Place the lid on the Flo-Well side panels then place the Flo-Well Surface Inlet onto the Flo-Well lid.
  • Install Pop-Up Emitter
    Using a Corrugated Pipe Adapter, connect the EZ-Drain to an elbow with a weep hole. The elbow should be installed with the weep hole on the horizontal side of the elbow. Slide the Pop-up Emitter onto the elbow. An additional length of pipe can be used between the elbow and Pop-Up Emitter to bring the Pop-up emitter to the surface. The Pop-Up Emitter fits on the bell or hub end of the pipe or a pipe coupler.

    TIP: To avoid damaging your Pop-Up Emitter with your lawn mower, raise the cutting level of the blades or avoid passing the mower over the Pop-Up Emitter
  • Backfill and Replant
    Backfill trenches and replace any grass or plants that were removed.

    TIP: DO NOT BACKFILL WITH SOIL WITH HIGH CLAY CONTENT. Water must be able to easily pass through the backfilled soil.If you want see the shopping list, click Get Installation Instructions.
  • Lay out system, dig trenches and holes
    Dig trench for the drain pipe and Flo-Well along the property line where the runoff is draining onto your property. Flo-Well(s) should be installed under the areas where the runoff is collecting. Dry fit (no glue) the entire drainage system from the Flo-Well to the pop-up emitter. Flo-Well(s)should be installed at least 10 feet away from any existing structure. Measure and cut all pipe to necessary lengths. After completing each step, glue parts together.
  • Install Flo-Well and drain pipe
    Knock out the appropriate holes in the side panels of the Flo-Well where the drain pipe will be installed. Assemble the Flo-Well using the interlocking side panels. Slide the drain pipe through the hole in the Flo-Well side panels.

    TIP: Lay the Flo-Well panels on bricks or other hard surfaces and use a hammer to knock out the holes in the side panels.
  • Connect Flo-Well Surface Inlet
    Knock out the center hole of the Flo-Well lid. Place the lid on the Flo-Well side panels then place the Flo-Well Surface Inlet onto the Flo-Well lid.
  • Install Pop-Up Emitter
    Connect the drain pipe exiting the Flo-Well to an elbow with a weep hole. The elbow should be installed with the weep hole on the horizontal side of the elbow. Slide the Pop-up Emitter onto the elbow. An additional length of pipe can be used between the elbow and Pop-Up Emitter to bring the Pop-up emitter to the surface. The Pop-Up Emitter fits on the bell or hub end of the pipe or a pipe coupler.

    TIP: To avoid damaging your Pop-Up Emitter with your lawn mower, raise the cutting level of the blades or avoid passing the mower over the Pop-Up Emitter
  • Backfill and Replant
    Backfill trenches and replace any grass or plants that were removed.If you want see the shopping list, click Get Installation Instructions.
  • Lay out system, dig trenches and holes
    Dig trench for the drain pipe and Spee-D basins along the property line where the runoff is draining onto your property. The Spee-D Basin should be installed under the areas where the runoff is collecting. Dry fit (no glue) the entire drainage system from the Spee-D Basin to the pop-up emitter. Measure and cut all pipe to necessary lengths. After completing each step, glue parts together.
  • Install Spee-D basin
    If using multiple Spee-D basins, connect the basins with a section of drain pipe. Use additional sections of pipe to connect the Spee-D Basin to the Pop-up emitter and elbow.

    TIP: Dig the hole for the basin an additional 6” deeper than needed. Place 6” of gravel in the bottom of the hole. Drill small holes in the bottom of the basin to prevent standing water in the bottom of the basin.
  • Install Pop-up Emitter
    The elbow should be installed with the weep hole on the horizontal side of the elbow. Slide the Pop-up Emitter onto the elbow. An additional length of pipe can be used between the elbow and Pop-Up Emitter to bring the Pop-up emitter to the surface. The Pop-Up Emitter fits on the bell or hub end of the pipe or a pipe coupler.

    TIP: To avoid damaging your Pop-Up Emitter with your lawn mower, raise the cutting level of the blades or avoid passing the mower over the Pop-Up Emitter
  • Backfill and replant
    Backfill trenches and replace any grass or plants that were removed.If you want see the shopping list, click Get Installation Instructions.
Step 4     Select Your Products

A Capacity Trench Drain system contains components. Quantity needed of each component will vary based on problem size and severity. Please Contact Us if you need any help.

CalcurateProduct Quantities


Need to talk to someone or find a local contractor?
Dr. Drainage is certified civil engineer and here to help you!

Installation Instructions & Shopping List